
I have had several people ask me how I made this sign and if it was complicated, etc. No, it's not complicated at all! Here's how I did it:
Materials
- 1 piece of ¾" plywood (mine was a scrap piece left over from making my media cabinet, but you can buy small pieces about the size that I used at Home Depot) cabinet grade plywood, which means that it was pre-sanded - you want this unless you have a sander and you are willing to sand it yourself before you paint
- Acrylic paint - you'll need black and white and whatever main color you want your sign to be
- Paint Pens - yes, they still make them (who grew up in the 80s and remembers these?) and you'll want them in whatever color you want your writing and in a thickness depending on the size of your sign/writing (they come in thick, medium and fine) - Sharpie makes several colors!
- Paint brush (duh!)
- Sewing transfer/carbon/tracing paper - I hardly ever use this for sewing because I hate store patterns, but it came in very handy for this!
- Pencil
- Computer & printer
- Measuring tape
- Painters Pyramids (not necessary, but oh so handy!! You can get them at Home Depot and Hobby Lobby)
- Paper towels
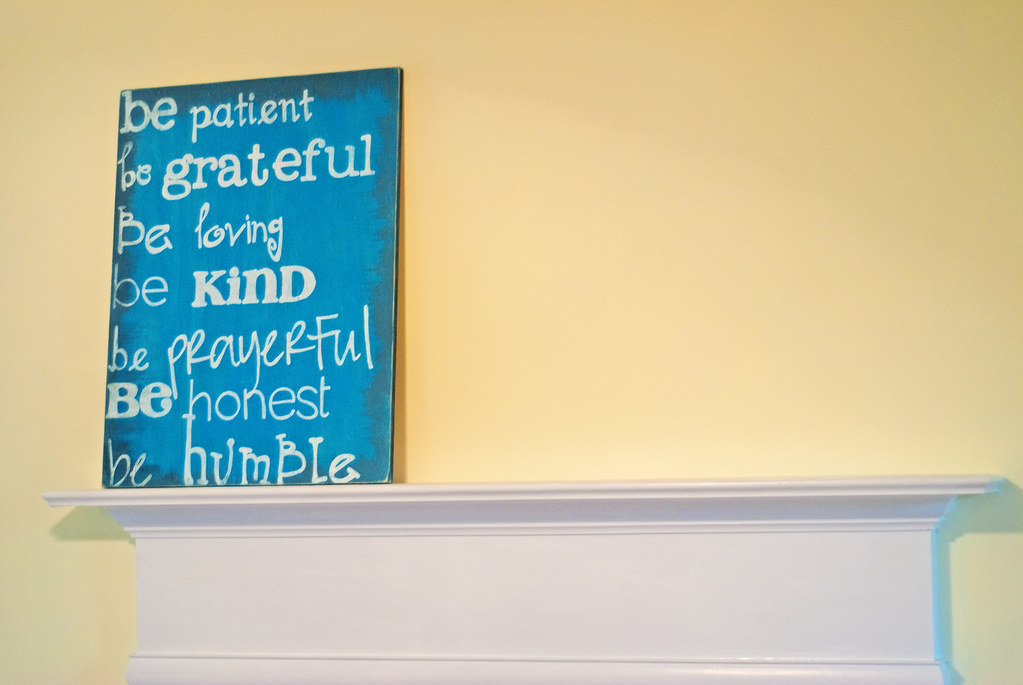
I measured my plywood so I would know how big the lettering should be. My plywood was 23" tall and I decided that I wanted the lettering to be 3" tall, so that gave me 7 lines to use. After that I chose 7 "Be" statements that I wanted (I wrote out "Be" statements from Matthew 5:3-10 (the beatitudes) and the Fruit of the Spirit and chose my favorites from that list).
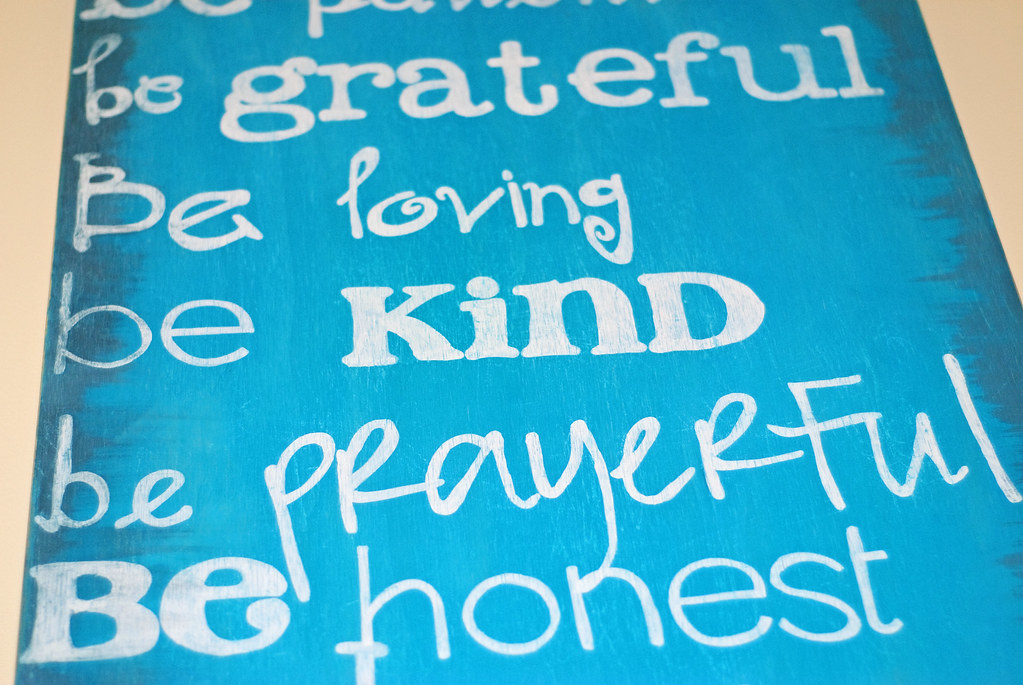
Next I used Pages (Pages on the Mac, or you can use MS Word on the PC) and typed out the words at 3" tall using various fonts. By the way, GREAT free fonts can be found at kevinandamanda.com! I then cut them out and arranged them on the plywood to see how they looked. That's when I decided to use different fonts for each word rather than having each line use the same font.
Once I liked the layout I then laid out my handy Painter's Pyramids on the table, squeezed out some lovely turquoise blue paint in a paper bowl and got to work! I did thin out the paint a bit to make it not so stark blue. That's your choice … test out the paint and see if you like it. Paint the front, as well as the edges!
Once my paint was dry I then laid a piece of white sewing transfer paper down, then my printed out words and traced them onto the sign. I worked with one word at a time. Each time I completed a word I then whipped out the handy paint pens. I ♥ these things!! I cannot freehand writing with just a paintbrush, so these are great! Just outline and then fill in … very simple!
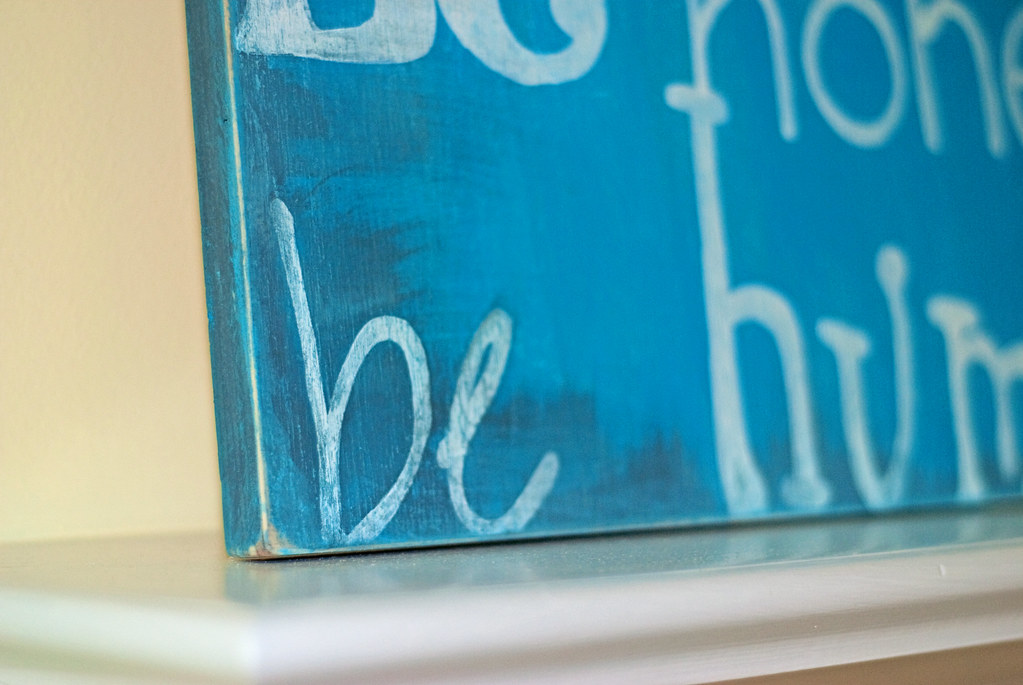
Once I was finished painting all the words I let it dry overnight just to be sure that everything was ready for distressing. The next day I mixed a little black, a little white and a little turquoise blue together until I got just the right shade of grey to go with the blue. I thinned it out again and then brushed that on the ¾" edges of the sign. Then, working in small sections at a time, I brushed some on the edges of the front of the sign with a paper towel and then promptly wiped off as much as I could with a different paper towel. When I got grey paint on the white letters I used my finger to wipe it off of the letters so they would more easily shine through.
Once I was satisfied with that process I got out one of my most favorite power tools …. my finishing sander! Be still my ♥ !! I know it's just a tool but still … it's fabulous! Anyway, I then just sanded …. sanded … sanded until I was satisfied with the amount of distressing I did. I sanded the entire sign as well as the ¾" edges. I rounded the corners a bit and took off more paint on the edges (as would really happen over time).
I then wiped off the excess dust and I was finished!
There are several variations you could do. For instance, you could paint one layer, let that dry, then paint a different main sign color on top. Then when you distress that first color will show through a bit (or a lot depending on how much you sand). Or you could stain the bare wood edges that show through after distressing. Just use a gel stain and a cotton swab. You could also apply more grey paint in various places such as the middle. I only used the grey on the sides because for some reason I wanted it to look like it was weathered from water on the edges. Don't know why, that's just what was going through my mind.
So there ya go. Very simple. Make one! If you do, I'd love to see it! ♥

Aahhhhh, thank you for this!!! I am HOPING I can get these done next week. I want to do Zeph. 3:17 as graduation presents and put each girls name in the scripture!
ReplyDelete